Fr/Tutoriels/Guide du débutant
| Cette page est incomplète. N'hésitez pas à participer : Éditer l'article. |
Contents
Lancement du jeu
Lorsqu'il arrive sur le jeu pour la première fois, le joueur est invité à suivre un rapide tutoriel d'introduction. Les nouveaux joueurs ont tout intérêt à commencer par là pour rapidement se sentir à l'aise avec les bases et les mécaniques fondamentales.
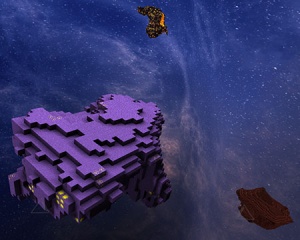
Après avoir finit le tutoriel, le joueur se retrouve face à une boutique dans le secteur 2,2,2 du système 0,0,0. Il est libre de se déplacer tout autour en utilisant les touches WASD, s'élever ou descendre avec E et Q et intéragir avec des objets, portes et PNJ avec R. Toutes ses actions se font en mode Astronaute, ce mode permet de rejoindre une entité (vaisseau, tourelle) ou de se balader dans une station spatiale.
En mode astronaute, le personnage évolue en apesanteur à moins de se trouver dans le voisinage d'un astre suffisement massif pour générer sa propre gravité (comme une planète ou un trou noir) ou s'il active une unité gravitationnelle.
Pour aligner un personnage avec un objet il faut s'approcher suffisemment de l'objet et appuyer sur Space. En faisant cela, le haut et le bas du personnage deviennent les mêmes que ceux de l'objet. C'est très utile lorsqu'on se retrouve désorienté dans un espace étroit.
Un dernier point important : La carte de la galaxie. Appuyez sur M pour avoir une vue de la galaxie. Utilisez ensuite la molette de la souris, WASD et E et Q pour naviguer. Pour plus de contrôles, consultez les annotations présentes sur la vue. Notez que les icônes visibles sur la carte peuvent représenter des boutiques, des stations spatiales, des repaires de pirates, ainsi que des entités inconnues qui ne demandent qu'à être explorées.
Interface utilisateur
- Version du client/FPS : Affiche la version du client utilisé et le nombre d'images par seconde (FPS).
- Total de crédits du personnage : Affiche la quantité totale de crédits que le joueur posséde sur lui.
- Secteur : Le secteur dans lequel le joueur se trouve.
- Système : Le système dans lequel le joueur se trouve.
- Nom du personnage : Le nom du personnage.
- Vitesse : La vitesse de navigation du joueur (en km/h).
- Raccourcis GUI : Shortcut buttons that take players to the GUI (Guided User Interface) to manage the game/game content in a variety of ways.
- Mini-map : Une petite carte qui affiche la position actuelle du joueur par rapport à son secteur ainsi que celle de toutes les entités ou personnages proches.
- Flêches de navigation : Les flèches qui indiquent l'orientation à prendre pour faire face à une point ou à une entité précise.
- Log du tchat : Affiche l'historique du tchat depuis la connexion du joueur (même si le personnage meurt entre temps).
- Points de vie (PV) : La quantité totale de Points de vie (PV) dont dispose le joueur. Elle est indiquée en pourcentage.
- Barre de raccourcis : Les objets que le joueur peut utiliser dans son environnement. Pour en sélectionner un il faut saisir au clavier le nombre associé à la case ou en utilisant la molette de la souris.
- Énergie : Le niveau d'énergie actuel de l'entité que contrôle le joueur. La barre est vide quand le joueur est en mode astronaute.
Votre premier vaisseau
Chaque joueur est équipé par défaut d'un lot de blocs lui permettant de construire un petit vaisseau dès son arrivée sur le serveur. Pour construire un vaisseau, le joueur doit disposer d'un noyau de vaisseau dans son inventaire ou dans sa barre de raccourcis, ensuite il doit orienter sa vue vers un espace vide et appuyer sur X. Une fenêtre demande alors d'entrer un nom pour le vaisseau et de valider. Il sera toujours possible de renommer le vaisseau en utilisant un module de faction.
Une fois que le vaisseau est créé, le noyau flotte dans l'espace. Pour lui ajouter des blocs on peut les poser simplement dessus à la main ou alors utiliser le mode construction. Le mode construction est généralement conseillé car il facilite grandement le processus en permettant entre autres de se déplacer plus rapidement pour faciliter l'observation.
Pour entrer dans le vaisseau il suffit d'intéragir avec le noyau avec la touche R. Ensuite, le joueur peut basculer à loisir entre le mode navigation et le mode construction avec Z. Avant de commencer la construction, il est important d'observer la flèche qui se trouve en haut au centre de l'écran. Elle indique la direction "avant" du vaisseau. Il peut arriver que les nouveaux joueurs construisent à l'envers ou sur le côté; vérifiez donc bien la direction indiquée par la flèche pour éviter ce genre de problèmes. Il n'y a pas encore la possibilité de changer l'orientation d'un vaisseau (version 0.1867).
Le déplacement en mode navigation fonctionne de la même manière qu'en mode Astronaute. WASDEQ pour se déplacer. Par contre, à la différence d'un personnage, l'accélération d'un vaisseau dépend de sa masse et du nombre de modules de propulsion dont il dispose. Plus d'informations sur les trois modes et le déplacement en général dans l'article Modes.
Si un joueur compte voyager rapidement sur une courte distance (un seul secteur) dans un environnement non hostile, il est possible d'utiliser un noyau de vaisseau nu (sans modules de propulsion). Appuyez sur X avec au moins un noyau de vaisseau dans l'inventaire, nommez l'entité, appuyez sur R pour en prendre le contrôle puis naviguez simplement avec. La vitesse de déplacement sera bien plus importante qu'en mode astronaute, il faudra aussi anticiper le délais pour atteindre une vitesse nulle, ce qui peut demander un peu d'entrainement. Il faudra aussi toujours penser à se balader avec un noyau de vaisseau dans l'inventaire, voir plusieurs.
Obtenir des ressources
Pour obtenir des ressources, le joueur utilisera un vaisseau équipé de modules de récolte/récupération pour extraire les blocs d'un astéroïde. Il pourra aussi le faire à la main s'il n'a pas d'autres choix mais la récolte sera très longue. Les métaux bruts et cristaux sont les plus prisés car en les raffinant on obtient des grilles métallique et des cristaux composites qui sont les éléments de base des usines.
Pour miner, on utilise donc des modules de récolte mais le vaisseau devra d'abord être équipé d'un ordinateur de récolte auquel seront reliés les modules. La liaison va se faire automatiquement si on place les modules juste après l'ordinateur (ce qui est valable pour tout les systèmes à base d'ordinateur et de modules). Lorsque les modules sont placés, le joueur peut passer en mode navigation pour assigner l'ordinateur de récolte à une case de la barre des raccourcis, pour se faire G puis il fera glisser l'ordinateur de récolte dans la barre. Il pressera à nouveau G pour fermer le menu de l'armement et revenir en mode navigation. On sélectionne la case où se trouve l'ordinateur puis on fait clique gauche pour commencer à miner l'astéroïde nous faisant face. Maintenir le clic permet de miner le plus possible avant le temps de recharge. Après le temps de recharge on peut répéter le processus.
Voir Méthodes de minage pour de plus amples informations.
Pour miner à la main, appuyez sur Right Click sur un bloc jusqu'à sa disparition. Un grillage bleue, qui apparait sur le bloc à miner, va devenir de plus en plus dense, il représente la durée de la récolte du bloc.
Primary Sources
| Asteroids: | If you're playing on a server that has a low population (or in single player), it is highly likely that you will see asteroids in the near distance. These can serve as an excellent source of initial raw materials needed to get started with manufacturing products necessary for building ships and stations. Additionally, since asteroids will always contain the same types of raw materials depending on their mineral composition, they can be sought out when the player requires a particular kind of raw material. Asteroids are also the only entity from which minerals may be naturally mined. |

| Planets: | Planets are much larger than asteroids and thus contain a much higher volume of raw materials. However, planets also contain a large number of blocks that serve only as decoration, which can become cumbersome when mining multiple planets. Each "face" (also called a segment or plate) of a planet will contain two random resources (ore and/or crystals) within. Twelve of these "faces" are on every planet, so the potential to obtain every ore and crystal on one planet does exist; however, there is no way to predict what resources a planet will contain, thus mining a planet when particular resources are being sought is not advisable early on in the game. |
Manufacturing
Follow this link to the Production page.
Ship Building for Beginners
There are many blocks to consider utilizing when building a ship in StarMade. Different blocks will give a ship different capabilities, weaknesses, and strengths.

|
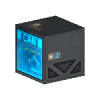
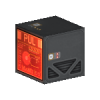
The Ship Core is the most important block on the ship. Interacting with the Ship Core will allow you to pilot the ship. Protecting the Ship Core is very important, so place it in a safe place (usually the center) of the ship and ensure it is well protected from incoming fire. Don't completely surround the Ship Core however, as leaving enough room to enter and leave the ship will prevent the character from accidentally ending up outside of the ship in open space. Always be sure to leave some room to exit the Ship Core. |
|---|
Armor

|
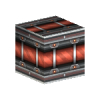
Basic Hull are light weight armor blocks that have little defense but are easy to produce and do not contribute much to a ship's mass. |
|---|---|

|
Standard Armor are medium weight and medium defense armor blocks. Good for most builds that expect to see at least some action. |

|
Advanced Armor are heavily armored blocks that weight 5 times as much as basic hull. Best for builds that need to take serious punishment but do not need to go anywhere fast. |
Power

|
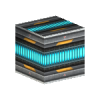
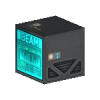
Reactors are self contained power modules that will automatically generate energy for your ship or other structure. All the player needs to set them up is to simply place them on their desired entity. Reactors placed in contiguous groupings will generate more power allowing the use of more powerful systems. Reactors will not only power the player's ship but also allow the use of various enhancements called Reactor Chambers. Reactors placed in non-contiguous groups will create a new Reactor group. All structures may have more than one Reactor group but only one group may be active at a time. |
|---|---|

|
Reactor Stabilizers are an equalizing element to off set the immense power that is generated by Reactor groups. As Reactor groups become larger they will begin dramatically lose their power regeneration efficiency. Stabilizers are designed to maintain the regen efficiency of any and all reactor groupings within their range. The caveat however is that Stabilizers must be placed relatively far away from any reactor groups. The further away the more integrity they maintain. |

|
Reactor Stabilizer Stream Nodes are a supplementary module for Reactor Stabilizers intended to direct the path of the Power Stream or "Power Worm" that connects a Reactor group to its Stabilizers. The Power Stream is an incredibly vulnerable part of a entity's power systems. If they receive any amount of damage the Reactor group will temporarily shut down leaving the entity completely without power generation for a short while. |
Chambers

|
Reactor Chambers are a unique set of blocks that are designed to grant special enhancements to the entity they are placed on. Chambers can bestow a plethora of power-ups such as increased Armor/shield defense, enhanced mobility, and boosts to basic ship functions like Scanners and Jump Drives. Other Chambers can also add new active abilities such as a Stealth Drive, Jump Inhibitors, and even natural gravity. All chambers must be connected with a Reactor Conduit to a Reactor group. |
|---|
Shields

|
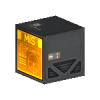
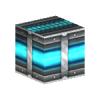
Shield Capacitors are designed to increase a ship's shield capacity. All ships will start with a maximum of 110 points of shield hit points. As you begin to build larger and better ships you will need to increase its survivability by increasing its shield HP. Simply placing one anywhere on your ship is enough however if destroyed you will instantly lose the maximum shield HP that that block provided. |
|---|---|

|
Shield-Rechargers when placed on an entity they will increase the amount of shield HP that is replenished per second. While Shield Capacitors increase the maximum shield HP that a ship has you will need shield-rechargers to charge and replenish them. As you begin to add more blocks the amount of shield that is recharged will also increase. As a trade off the amount of shield HP being replenished per second also is being drained from your ship's power reserves. Ships with massive shield systems must also come prepared to handle the constant power drain. |
Propulsion

|
Thruster Modules when placed will increase a ships thrust and are the primary means of propulsion in the game. As you add more blocks to your ship it will increase in mass. The more mass a ship has the harder it will be to accelerate to its maximum speed. Adding more thruster modules will add thrust, which increases the ships maximum speed and can allow ships to reach max speed much faster. You can allocate the amount of thrust that is outputted in a given direction by using the Thrust Management Menu. |
|---|
Weapons
As players begin to venture out in to the universe you will begin to encounter various threats. In order for players to protect themselves there are a variety of weapons that can be installed on ships to fight off anything that may wish ill on the player and their property. Weapons can also be linked to an effect computer or another weapon computer to add new offensive properties to the main weapon. For instance, linking a Damage Beam Computer to a Missile Computer will turn the normally dumb fire missiles into a tracking missile with lock on functions.
| Cannon System |
  |
Fires a powerful semi-automatic projectile. When linked to another weapon system it provides a bonus to rate of fire. |
|---|---|---|
| Missile System |
  |
Fires a powerful dumb fire missile, linking other weapon computers can alter the missiles tracking capabilities. When linked to another weapon system it increases the amount of projectiles that are fired at once. |
| Damage Beam System |
  |
Fires a hit-scan laser beam that deals continuous damage as long as the beam hits a target. When linked to another weapon system it provides a bonus to weapon range. |
| Damage Pulse System |
  |
Fires a close-range energy bubble that can damage anything near its point of origin. When linked to another weapon system it provides a bonus to weapon damage. |
Credits
The general currency used in StarMade is a Credit. Credits allow players to buy various blocks and other items at shops. Shops also allow players to sell certain blocks and other items for credits. For information on how to efficiently obtain credits, see the Making Credits section in the tutorials.
Pirates
Follow this link to the Pirates section of the Factions page.
Setting Up a Base
When setting up a base, you may want to consider an area to build said base. If you have performance problems, you may want to save up and create a station. If your computer is fine with planets, then you build a base on a planet. You should also consider what the size of the planet is (for the medicore computer) and the looks, if you do not like the planet's surface then you should move on to the next. You cannot create a asteroid base, as of the current versions. You also may want to consider creating a planet base, then moving into a station. While inside your first base, you should place down a faction block (make sure you have a faction, if not create one), claim the base, the system, and if desired, set the base as "Home base". This will make your base invulnerable to all damage whatsoever as long as anything docked with it. If playing multiplayer, ALWAYS dock to a planet. Never leave a ship on the surface, even on singe player. Ships on surfaces are like lag generators. After all this you are ready to set up facilities, which in time will include the following:
- Docking ports for ships (A must for planet bases)
- Factories for mass processing and crafting, and possibly specialized factories
- Power for your turrets, factories, etc (try making a efficient reactor!)
- Turrets or drones for defense
- A shipyard, if on a station
Note that these things are not all necessary (besides power), and a station is less resource intensive and less vulnerable.
Factions
Factions are similar to guilds or clans, where players can invite and recruit members into a cooperative group. This group will share the alliances and enemies of the faction. Factions can be at war with one another, causing players in those factions to appear as enemies.
There are many benefits to belonging to a faction. Working together to achieve common goals is a large benefit, but there are features that factions provide which also enhance the game experience. Visit the Factions page for more details.
Death
Upon dying, a player will lose 10% of the credits that the player was carrying at the time that the death occurred, some faction points, and the player will respawn at the last PlexUndeathinator they touched or at the starting Shop if a PlexUndeathinator was never activated by the player. Items being carried by the player in the inventory or hotbar will not be lost upon death.
Game Progression
StarMade is a sandbox game where you create your own fun, but progress can be measured in the form of how powerful your ship is, how big your faction is, or maybe how rich you are. Players are expected to create their own goals, but a few can be suggested.
- Create different Ships
- Create a Space Station
- Create a Faction
- Claim territory for your Faction
- Create a Faction Home Base
- Hunt Pirates and Pirate Stations
- Mine resources to create materials
- Sell materials to other players
- Player VS Player combat
- Faction Wars
There are many other goals you can set for yourself.
Multiplayer
StarMade is fun in single player mode, but playing with friends in multi-player mode can enrich the StarMade experience. A list of public servers that players may openly join can be viewed by clicking on the "Server List" button next to the MultiPlayer section under the Game category in the StarMade Connection Setup window (the one that opens after the initial launcher). A player can also host their own private server for their friends to join as well. See Multi-Player for more information.
One of the benefits of StarMade multiplayer is the Blueprint system. Ship blueprints can be saved, allowing you to remake any ship which you have blueprints for. This includes ships built in solo mode, or on other multiplayer servers. With the ability to make a blueprint and bring your creations from one server to the next, you never have to lose your creations. This also allows you to download blueprints of ships created by the community. Please see Blueprints for more information.