Difference between revisions of "Cannon Computer"
12yanogden (talk | contribs) m |
12yanogden (talk | contribs) m |
||
| Line 40: | Line 40: | ||
|Range<span style="color: grey"><small> (In Meters)</small></span> ||style="text-align:center;"| - ||style="text-align:center;"| 4,000<span style="color: grey">.0</span> | |Range<span style="color: grey"><small> (In Meters)</small></span> ||style="text-align:center;"| - ||style="text-align:center;"| 4,000<span style="color: grey">.0</span> | ||
|- | |- | ||
| − | |Power Consumption<span style="color: grey"><small> (Resting)</small></span> ||style="text-align:center;"|<span style="color: | + | |Power Consumption<span style="color: grey"><small> (Resting)</small></span> ||style="text-align:center;"|<span style="color: red">Increases</span> ||style="text-align:center;"| +3<span style="color: grey">.0</span> |
|- | |- | ||
| − | |Power Consumption<span style="color: grey"><small> (Charging)</small></span> ||style="text-align:center;"|<span style="color: | + | |Power Consumption<span style="color: grey"><small> (Charging)</small></span> ||style="text-align:center;"|<span style="color: red">Increases</span> ||style="text-align:center;"| +20<span style="color: grey">.0</span> |
|- | |- | ||
|Block Penetration<span style="color: grey"><small> (Based on Damage/Module count)</small></span>||style="text-align:center;"|<span style="color: green">Increases</span>|| 2 <span style="color: grey"><small> (Default)</small></span><br/>3 <span style="color: grey"><small> (At 60 Dmg/3 Modules)</small></span><br/>4 <span style="color: grey"><small> (at 200 Dmg/10 Modules)</small></span><br/>5 <span style="color: grey"><small> (at 500 Dmg/25 Modules)</small></span><br/>6 <span style="color: grey"><small> (at 1,020 Dmg/51 Modules)</small></span><br/>7 <span style="color: grey"><small> (at 1,800 Dmg/90 Modules)</small></span><br/>8 <span style="color: grey"><small> (at 2,900 Dmg/ 145 Modules)</small></span><br/>9 <span style="color: grey"><small> (at 4,340 Dmg/217 Modules)</small></span><br/>10 <span style="color: grey"><small> (at 6,220 Dmg/311 Modules)</small></span><br/>11 <span style="color: grey"><small> (at 8,540 Dmg/427 Modules)</small></span><br/>12 <span style="color: grey"><small> (at 11,360 Dmg/568 Modules)</small></span><br/>13 <span style="color: grey"><small> (at 14,720 Dmg/736 Modules)</small></span><br/>14 <span style="color: grey"><small> (at 18,680 Dmg/934 Modules)</small></span><br/>15 <span style="color: grey"><small> (at 23,260 Dmg/1,163 Modules)</small></span><br/> | |Block Penetration<span style="color: grey"><small> (Based on Damage/Module count)</small></span>||style="text-align:center;"|<span style="color: green">Increases</span>|| 2 <span style="color: grey"><small> (Default)</small></span><br/>3 <span style="color: grey"><small> (At 60 Dmg/3 Modules)</small></span><br/>4 <span style="color: grey"><small> (at 200 Dmg/10 Modules)</small></span><br/>5 <span style="color: grey"><small> (at 500 Dmg/25 Modules)</small></span><br/>6 <span style="color: grey"><small> (at 1,020 Dmg/51 Modules)</small></span><br/>7 <span style="color: grey"><small> (at 1,800 Dmg/90 Modules)</small></span><br/>8 <span style="color: grey"><small> (at 2,900 Dmg/ 145 Modules)</small></span><br/>9 <span style="color: grey"><small> (at 4,340 Dmg/217 Modules)</small></span><br/>10 <span style="color: grey"><small> (at 6,220 Dmg/311 Modules)</small></span><br/>11 <span style="color: grey"><small> (at 8,540 Dmg/427 Modules)</small></span><br/>12 <span style="color: grey"><small> (at 11,360 Dmg/568 Modules)</small></span><br/>13 <span style="color: grey"><small> (at 14,720 Dmg/736 Modules)</small></span><br/>14 <span style="color: grey"><small> (at 18,680 Dmg/934 Modules)</small></span><br/>15 <span style="color: grey"><small> (at 23,260 Dmg/1,163 Modules)</small></span><br/> | ||
| Line 98: | Line 98: | ||
|Damage Output <span style="color: grey"><small>(Per Activation)</small></span> ||style="text-align:center;"| <span style="color: red">Decreases</span> ||style="text-align:center;"| x1 ||style="text-align:center;"| x0.2 | |Damage Output <span style="color: grey"><small>(Per Activation)</small></span> ||style="text-align:center;"| <span style="color: red">Decreases</span> ||style="text-align:center;"| x1 ||style="text-align:center;"| x0.2 | ||
|- | |- | ||
| − | |Reload<span style="color: grey"><small> (In Seconds)</small></span> ||style="text-align:center;"| <span style="color: | + | |Reload<span style="color: grey"><small> (In Seconds)</small></span> ||style="text-align:center;"| <span style="color: green">Decreases</span> || style="text-align:center;"| 1<span style="color: grey">.0</span>||style="text-align:center;"|0.1 |
|- | |- | ||
|Shots<span style="color: grey"><small> (Per Activation)</small></span> ||style="text-align:center;"| - ||colspan="2" style="text-align:center;"| 1 | |Shots<span style="color: grey"><small> (Per Activation)</small></span> ||style="text-align:center;"| - ||colspan="2" style="text-align:center;"| 1 | ||
| Line 106: | Line 106: | ||
|Range<span style="color: grey"><small> (In Sector Lengths)</small></span> ||style="text-align:center;"| - ||colspan="2" style="text-align:center;"| 1<span style="color: grey">.0</span> | |Range<span style="color: grey"><small> (In Sector Lengths)</small></span> ||style="text-align:center;"| - ||colspan="2" style="text-align:center;"| 1<span style="color: grey">.0</span> | ||
|- | |- | ||
| − | |Power Consumption<span style="color: grey"><small> (Per Activation)</small></span> ||style="text-align:center;"|<span style="color: | + | |Power Consumption<span style="color: grey"><small> (Per Activation)</small></span> ||style="text-align:center;"|<span style="color: green">Decreases</span> ||style="text-align:center;"| x1 ||style="text-align:center;"| x0.2 |
|- | |- | ||
|Block Penetration<span style="color: grey"><small> (Based on Percent Ratio, Tier)</small></span>||style="text-align:center;"|<span style="color: red">Decreases</span>||colspan="2" style="text-align:right;"| -Latest Tier<span style="color: grey"><small> (starts at 11.2% ratio)</small></span> <br/> -Next Tier <span style="color: grey"><small> (at 39.4% ratio, 53.1% ratio,<br/> 63.6% ratio, 72.5% ratio,<br/> 80.3% ratio, 87.4% ratio,<br/> 94.0% ratio,)</small></span> | |Block Penetration<span style="color: grey"><small> (Based on Percent Ratio, Tier)</small></span>||style="text-align:center;"|<span style="color: red">Decreases</span>||colspan="2" style="text-align:right;"| -Latest Tier<span style="color: grey"><small> (starts at 11.2% ratio)</small></span> <br/> -Next Tier <span style="color: grey"><small> (at 39.4% ratio, 53.1% ratio,<br/> 63.6% ratio, 72.5% ratio,<br/> 80.3% ratio, 87.4% ratio,<br/> 94.0% ratio,)</small></span> | ||
| Line 139: | Line 139: | ||
|Total Damage Output <span style="color: grey"><small>(Per Activation)</small></span> ||style="text-align:center;"| <span style="color: green">Increases</span> ||style="text-align:center;"| x1||style="text-align:center;"|x4 | |Total Damage Output <span style="color: grey"><small>(Per Activation)</small></span> ||style="text-align:center;"| <span style="color: green">Increases</span> ||style="text-align:center;"| x1||style="text-align:center;"|x4 | ||
|- | |- | ||
| − | |Reload<span style="color: grey"><small> (In Seconds)</small></span> ||style="text-align:center;"| <span style="color: | + | |Reload<span style="color: grey"><small> (In Seconds)</small></span> ||style="text-align:center;"| <span style="color: red">Increases</span> ||style="text-align:center;"| 1<span style="color: grey">.0</span>||style="text-align:center;"|2<span style="color: grey">.0</span> |
|- | |- | ||
|Shots<span style="color: grey"><small> (Per Activation)</small></span> ||style="text-align:center;"| <span style="color: green">Increases</span> ||style="text-align:center;"| 1||style="text-align:center;"|10 | |Shots<span style="color: grey"><small> (Per Activation)</small></span> ||style="text-align:center;"| <span style="color: green">Increases</span> ||style="text-align:center;"| 1||style="text-align:center;"|10 | ||
| Line 147: | Line 147: | ||
|Range<span style="color: grey"><small> (In Sector Lengths)</small></span> ||style="text-align:center;"| - ||colspan="2" style="text-align:center;"| 1<span style="color: grey">.0</span> | |Range<span style="color: grey"><small> (In Sector Lengths)</small></span> ||style="text-align:center;"| - ||colspan="2" style="text-align:center;"| 1<span style="color: grey">.0</span> | ||
|- | |- | ||
| − | |Power Consumption<span style="color: grey"><small> (Per Activation)</small></span> ||style="text-align:center;"|<span style="color: | + | |Power Consumption<span style="color: grey"><small> (Per Activation)</small></span> ||style="text-align:center;"|<span style="color: red">Increases</span> ||style="text-align:center;"| x1||style="text-align:center;"|x4 |
|- | |- | ||
|Block Penetration<span style="color: grey"><small> (Based on Damage)</small></span>||style="text-align:center;"|<span style="color: green">Increases</span>||colspan="2" style="text-align:center;"| <small><span style="color: grey">''Based on Weapon Array's <br/>Total Damage Output.<br/>Compounds with<br/> Master system's Damage''</span></small> | |Block Penetration<span style="color: grey"><small> (Based on Damage)</small></span>||style="text-align:center;"|<span style="color: green">Increases</span>||colspan="2" style="text-align:center;"| <small><span style="color: grey">''Based on Weapon Array's <br/>Total Damage Output.<br/>Compounds with<br/> Master system's Damage''</span></small> | ||
| Line 178: | Line 178: | ||
|Damage Output <span style="color: grey"><small>(Per Projectile)</small></span> ||style="text-align:center;"| <span style="color: green">Increases</span> ||style="text-align:center;"| x1||style="text-align:center;"|x8 | |Damage Output <span style="color: grey"><small>(Per Projectile)</small></span> ||style="text-align:center;"| <span style="color: green">Increases</span> ||style="text-align:center;"| x1||style="text-align:center;"|x8 | ||
|- | |- | ||
| − | |Reload<span style="color: grey"><small> (In Seconds)</small></span> ||style="text-align:center;"| <span style="color: | + | |Reload<span style="color: grey"><small> (In Seconds)</small></span> ||style="text-align:center;"| <span style="color: red">Increases</span> ||style="text-align:center;"| 1<span style="color: grey">.0</span>||style="text-align:center;"|4<span style="color: grey">.0</span> |
|- | |- | ||
|Shots<span style="color: grey"><small> (Per Activation)</small></span> ||style="text-align:center;"| - ||colspan="2" style="text-align:center;"| 1 | |Shots<span style="color: grey"><small> (Per Activation)</small></span> ||style="text-align:center;"| - ||colspan="2" style="text-align:center;"| 1 | ||
| Line 186: | Line 186: | ||
|Range<span style="color: grey"><small> (In Sector Lengths)</small></span> ||style="text-align:center;"| <span style="color: green">Increases</span> ||style="text-align:center;"| 1<span style="color: grey">.0</span>||style="text-align:center;"|3<span style="color: grey">.0</span> | |Range<span style="color: grey"><small> (In Sector Lengths)</small></span> ||style="text-align:center;"| <span style="color: green">Increases</span> ||style="text-align:center;"| 1<span style="color: grey">.0</span>||style="text-align:center;"|3<span style="color: grey">.0</span> | ||
|- | |- | ||
| − | |Power Consumption<span style="color: grey"><small> (Per Activation)</small></span> ||style="text-align:center;"|<span style="color: | + | |Power Consumption<span style="color: grey"><small> (Per Activation)</small></span> ||style="text-align:center;"|<span style="color: red">Increases</span> ||style="text-align:center;"| x1||style="text-align:center;"|x8 |
|- | |- | ||
|Block Penetration<span style="color: grey"><small> (Based on Damage)</small></span>||style="text-align:center;"| <span style="color: green">Increases</span>||colspan="2" style="text-align:center;"| <small><span style="color: grey">''Compounds with<br/> Master system's Damage''</span></small> | |Block Penetration<span style="color: grey"><small> (Based on Damage)</small></span>||style="text-align:center;"| <span style="color: green">Increases</span>||colspan="2" style="text-align:center;"| <small><span style="color: grey">''Compounds with<br/> Master system's Damage''</span></small> | ||
Latest revision as of 06:54, 27 October 2018
| Pieces of information on this page are out of date. If you would like to add/correct any data on this page press this link. |
| Cannon Computer | |
|---|---|
 | |
| Hit Points | 50 |
| Volume | 0.1 |
| Reactor Hit Points | 0 |
| Mass | 0.1 |
| Luminosity | none |
| Data Value (ID) | 6 |
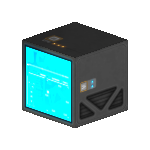
Cannon Computers are the main terminals for Cannon weapon systems. Cannons fire a single but powerful projectile and are the first weapon system that players have access to upon starting the game. Connecting this computer to another weapon computer will grant different slaving abilities.
Contents
Item Description
"The Cannon Computer is required for creating functioning Cannon systems. It is capable of controlling any amount of Cannon Barrels, although using multiple groups leads to escalating power costs. Once placed, you can select/deselect it with C, and link Cannon Barrels using V while it is selected and you are looking at a Cannon Barrel. This controller can be connected to other weapons and systems (cannon, beam, damage pulse, missile) to customize your weapon.
To link your Controller to its Modules, press C on the Controller, then X on the individual modules, or alternatively Shift + $CONNECT_MODULE to mass select grouped modules.
Afterwards you can link it to another weapon by connecting the weapon controller you want to upgrade with the weapon controller you just made. You can do this manually with $SELECT_MODULE and $CONNECT_MODULE or in the Weapons Menu.
Note that for the full effect, you need to connect 1:1 in size.
Press R to get in/out of the Computer."
Production
| Production Info | |||||
|---|---|---|---|---|---|
| Produced in a | Standard Factory |  |
|||
| Requires | To create | ||||
| Hylat Capsule | x500 |
 |
Cannon Computer | x1 |
 |
| Crystal Composite | x500 |
 |
|||
Usage
- Main article: Weapon Systems
| Weapon Stats | ||
|---|---|---|
| Stat | Value Per Module | Value |
| Damage Output (Per Activation) | Increases | +20 |
| Reload (In Seconds) | - | 1.0 |
| Projectile Speed (In Meters per Second) | - | 1875.0 |
| Range (In Meters) | - | 4,000.0 |
| Power Consumption (Resting) | Increases | +3.0 |
| Power Consumption (Charging) | Increases | +20.0 |
| Block Penetration (Based on Damage/Module count) | Increases | 2 (Default) 3 (At 60 Dmg/3 Modules) 4 (at 200 Dmg/10 Modules) 5 (at 500 Dmg/25 Modules) 6 (at 1,020 Dmg/51 Modules) 7 (at 1,800 Dmg/90 Modules) 8 (at 2,900 Dmg/ 145 Modules) 9 (at 4,340 Dmg/217 Modules) 10 (at 6,220 Dmg/311 Modules) 11 (at 8,540 Dmg/427 Modules) 12 (at 11,360 Dmg/568 Modules) 13 (at 14,720 Dmg/736 Modules) 14 (at 18,680 Dmg/934 Modules) 15 (at 23,260 Dmg/1,163 Modules) |
| Primary Module | |
|---|---|
| Cannon Barrel | |

| |
| Connection Method | |
| Select computer withC and connect with V | |
| Primary Fire Left Click Fire Right Click Zoom In/Out Left Alt Switch Firing Mode | |
| Semi-Automatic Projectile | |
| Damage Percentages | |
| Kinetic (▲) | 50% |
| EM (=) | 33% |
| Heat (▼) | 17% |
| Slaving Effect | |
| Cannon | Increased Rate of Fire |
| Missile | Fire Heat-Seeking Missiles |
| Damage Beams | Fire Continuous Beams |
| Unique Property | |
| -Can shoot down missiles -AoE damage dependent on the X and Y dimensions of an array | |
Weapon Slaving
Machine Gun
| Weapon Stats | |||
|---|---|---|---|
| Stat | Value Based on Increased Ratio |
Min/Max Value | |
| Damage Output (Per Activation) | Decreases | x1 | x0.2 |
| Reload (In Seconds) | Decreases | 1.0 | 0.1 |
| Shots (Per Activation) | - | 1 | |
| Projectile Speed (In Meters per Second) | - | 937.5 | |
| Range (In Sector Lengths) | - | 1.0 | |
| Power Consumption (Per Activation) | Decreases | x1 | x0.2 |
| Block Penetration (Based on Percent Ratio, Tier) | Decreases | -Latest Tier (starts at 11.2% ratio) -Next Tier (at 39.4% ratio, 53.1% ratio, 63.6% ratio, 72.5% ratio, 80.3% ratio, 87.4% ratio, 94.0% ratio,) | |
| Slaved Computer | |
|---|---|
| Cannon Computer | |

| |
| Connection Method | |
| Select primary computer withC and connect with V | |
| Primary Fire Left Click Fire Right Click Zoom In/Out Left Alt Switch Firing Mode | |
| Automatic Rapid Fire Projectiles | |
| Unique Property | |
| -Can shoot down missiles -AoE damage dependent on the X and Y dimensions of an array | |
Charge Shot
| Weapon Stats | |||
|---|---|---|---|
| Stat | Value Based on Increased Ratio |
Min/Max Value | |
| Damage Output (Per Projectile) | Decreases | x1 | x0.4 |
| Total Damage Output (Per Activation) | Increases | x1 | x4 |
| Reload (In Seconds) | Increases | 1.0 | 2.0 |
| Shots (Per Activation) | Increases | 1 | 10 |
| Projectile Speed (In Meters per Second) | - | 937.5 | |
| Range (In Sector Lengths) | - | 1.0 | |
| Power Consumption (Per Activation) | Increases | x1 | x4 |
| Block Penetration (Based on Damage) | Increases | Based on Weapon Array's Total Damage Output. Compounds with Master system's Damage | |
| Slaved Computer | |
|---|---|
| Missile Computer | |

| |
| Connection Method | |
| Select primary computer withC and connect with V | |
| Primary Fire Left Click Fire Right Click Zoom In/Out Left Alt Switch Firing Mode | |
| Charge-able Projectile | |
| Unique Property | |
| -Can shoot down missiles -AoE damage dependent on the X and Y dimensions of an array | |
Sniper Rifle
| Weapon Stats | |||
|---|---|---|---|
| Stat | Value Based on Increased Ratio |
Min/Max Value | |
| Damage Output (Per Projectile) | Increases | x1 | x8 |
| Reload (In Seconds) | Increases | 1.0 | 4.0 |
| Shots (Per Activation) | - | 1 | |
| Projectile Speed (In Meters per Second) | Increases | 937.5 | 1875 |
| Range (In Sector Lengths) | Increases | 1.0 | 3.0 |
| Power Consumption (Per Activation) | Increases | x1 | x8 |
| Block Penetration (Based on Damage) | Increases | Compounds with Master system's Damage | |
| Slaved Computer | |
|---|---|
| Damage Beam Computer | |

| |
| Connection Method | |
| Select primary computer withC and connect with V | |
| Primary Fire Left Click Fire Right Click Zoom In/Out Left Alt Switch Firing Mode | |
| Single Long-Range Projectile | |
| Unique Property | |
| -Can shoot down missiles -AoE damage dependent on the X and Y dimensions of an array | |